이 글은 개인적으로 학습한 내용을 기록하기 위한 글이다.
참고 동영상
https://www.youtube.com/watch?v=W3N7JpjqLuU
프롬프트 작성법과 관리 팁을 정리해보고자 한다.
스테이블 디퓨전을 활용하기 위한 세팅 1와 이어지는 영상이고 거기서 세팅이 어느정도 되어 있어야 이후 작업을 좀 편하게 할수 있다.
대한항공 스타일의 여성 스튜어디스를 만드는 과정을 쭉 정리해보자.
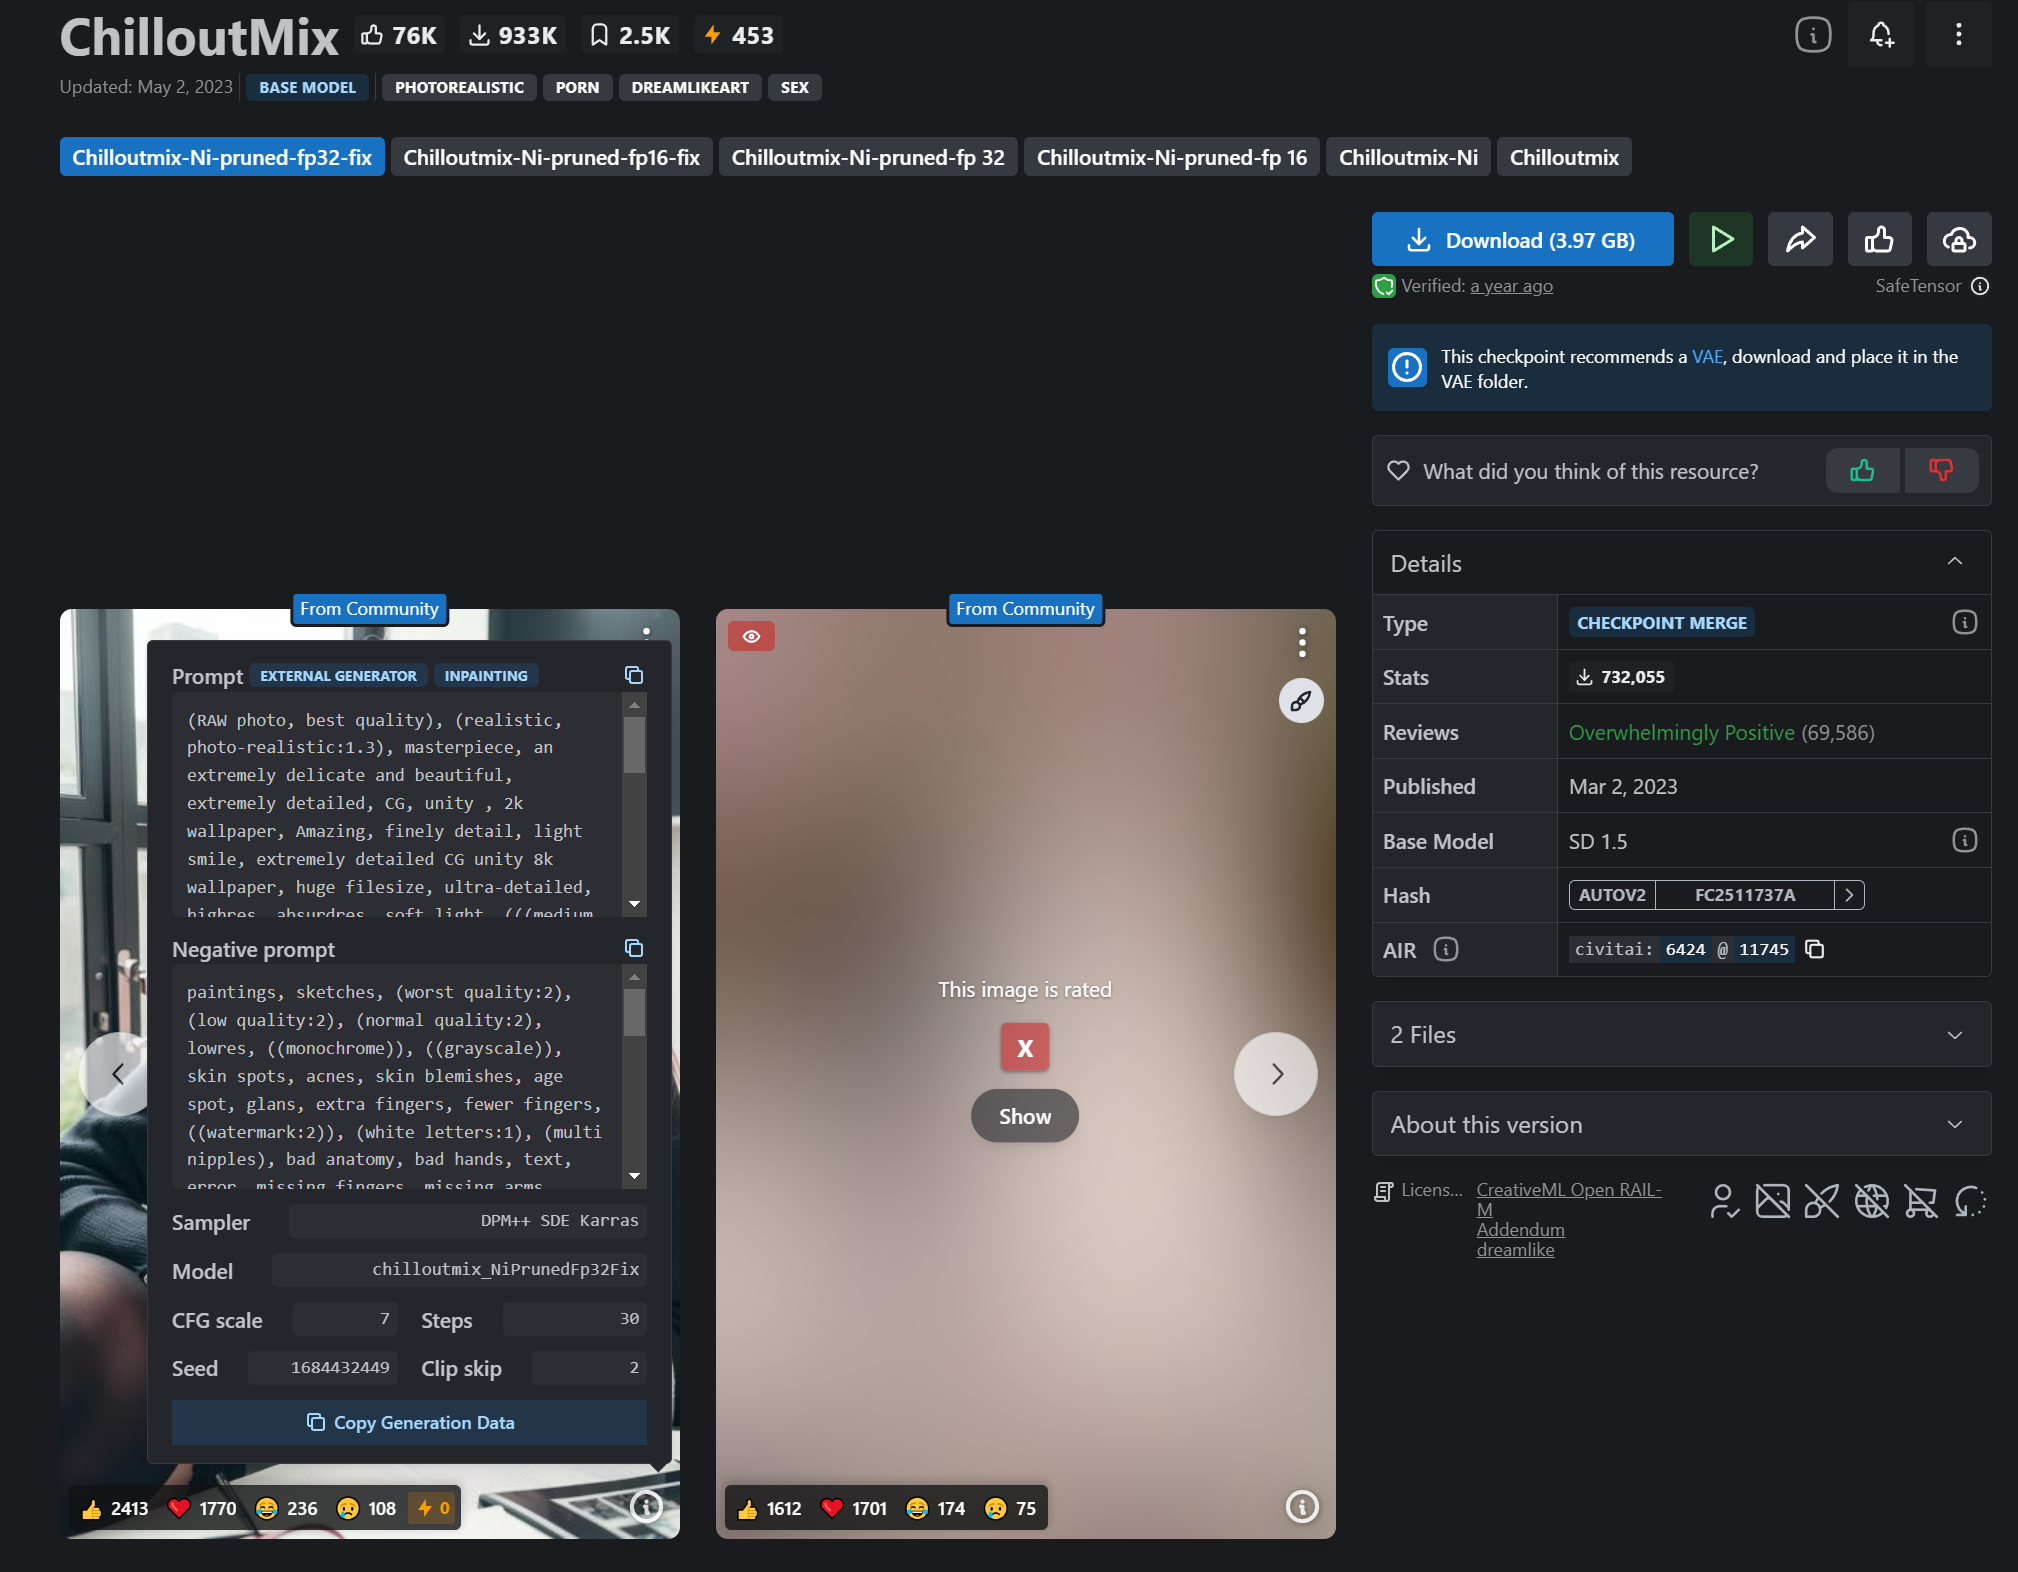
여기서 체크포인트라는 용어가 나오는데 쉽게 말하면 어떤 이미지를 만들기 위한 베이스 모델이라는 의미이다. 영상에서는 저자가 Chilloutmix, Dreamshaper, Henmixreal이라는 것들을 가지고 있다고 나오는데 이 모델들은 civitai에서 쉽게 다운받을수 있다. 영상에서는 홈피에서는 검색만 한다.
civitai.com에서 처음 영상 검색할때 주의할점은 누드, 성행위등의 이미지들이 상당히 많기 때문에 공공장소에서 검색할때 조심하는게 좋다. 요즘은 디폴트로 블러처리(상단의 옵션에서 해제가능)가 되어 있어 괜찮긴한데 암튼 조심하자.
영상에서 Chilloutmix 모델에 대해 설명할때 Chilloutmix_koreanDoll를 사용하고 있다고 하는데 다운받는 모델은 Chilloutmix > Chilloutmix-Ni_pruned-fp32-fix 이다. Stability Matrix에서 바로 검색해서 다운받을수 있다. 참고로 스샷이 틀릴수 있는데 파일 이름만 맞으면 된다.
팁이 하나 있다면 모델은 많이 가지고 있을수록 좋다고 생각되는데 어느 순간에 좋다고 생각한 모델이 웹페이지에서 검색이 안되거나 없어지는 경우가 있다. 해당 모델을 구글링해서 찾아보면 모델을 만든 유저가 유료로 판매하는 사이트 같은데올려놓는 경우도 발견했다. 그래서 맘에 드는 모델이 있다면 일단 다운받아서 베이스 모델별로 정리해서 가지고 있는게 좋다고 생각된다. 하지만 모델 용량이 워낙 커서 몇십개만 모아놔도 수백기가는 금방 찬다. 대용량의 하드나 외장하드등 백업 수단이 필요한게 단점일수 있겠다.
모델을 다운받고 Chilloutmix-Ni_pruned-fp32-fix 로 세팅후에 프롬프트에 travel attendant라고 입력하면 (네이버 검색하니 flight attendant, cabin attendant, stewardess) 등이 검색이 된다.
아무 설정 없이 생성을 누르면 남자승무원이 생성된다.

프롬프트에 1girl를 추가하고 생성하면
1gril, travel attendant,

여자 승무원이 생성되는데 얼굴 디테일이 많이 깨져보인다. 그리고 인종도 서양풍의 여성이다.
이런식의 프롬프트는 많이 부족하다는걸 알수 있다. 그럼 잘 작성된 프롬프트를 하나 가져와서 편집해서 쓰는 것도 방법중의 하나일 것이다.
영상에서 처럼 Civitai 사이트의 영상에서 찾은 Chilloutmix 모델페이지에서 긍정 프롬프트를 추출해서 가져온다.

가져온 프롬프트에서 필요없는 거나 맞지않는 프롬프트는 빼고 재 가공한다. (영어실력 필요 ㅜㅜ)
원본
best quality, (photorealistic:1.4), 1girl, (black shirt:1.2), (grey long pants:1.2),(white suspenders:1.4), perfect female figure, full body, from back, white background, short hair, slim
->
수정본
best quality, (photorealistic:1.4), perfect female figure, full body,
1girl, travel attendant,
그리고 다시 생성해보면 (몇번은 전혀 엉뚱한 이미지들이 생성되었다.) 스튜어디스와 비슷한 이미지를 생성해볼수 있다.
프롬프트를 좀 더 보강해 보자.

아까 위에서 추출한 이미지 옆에 이미지에서 다시 다른 프롬프트를 가져와서
원본
(RAW photo, best quality), (realistic, photo-realistic:1.3), masterpiece, an extremely delicate and beautiful, extremely detailed, CG, unity , 2k wallpaper, Amazing, finely detail, light smile, extremely detailed CG unity 8k wallpaper, huge filesize, ultra-detailed, highres, absurdres, soft light, (((medium hair:1.3), short bang, pink hair, floating hair novafrogstyle)), beautiful detailed girl, detailed fingers, extremely detailed eyes and face, beautiful detailed nose, beautiful detailed eyes, long eyelashes, light on face, looking at viewer, (closed mouth:1.2), 1girl, cute, young, mature face, (full body:1.3), ((small breasts)), realistic face, realistic body, beautiful detailed thigh, (ulzzang-6500-v1.1:0.8), <lora:koreanDollLikeness_v15:0.4>, business suit, cross-laced clothes, collared shirt, open clothes, in office, detailed office, open cardigan, black thighhighs, miniskirt, black underwear, unbuttoned shirt,
- >
수정본
best quality, (photorealistic:1.4), perfect female figure, full body,
(RAW photo, best quality), (realistic, photo-realistic:1.3), masterpiece, an extremely delicate and beautiful, extremely detailed, finely detail, 8k, huge filesize, ultra-detailed, highres, soft light, beautiful detailed girl, detailed fingers, extremely detailed eyes and face, beautiful detailed nose, beautiful detailed eyes, long eyelashes, light on face, looking at viewer, cute, young, ((small breasts)), realistic face, realistic body, beautiful detailed thigh, (ulzzang-6500-v1.1:0.8), 1girl, travel attendant,
위 프롬프트를 그대로 넣으면 후방 주의 영상이 나올수 있으니 조심하고 ㅎㅎ... small breasts 라는 단어 때문에 젖꼭지가 나오는 영상이 만들어진다. 그리고 프롬프트에서 ( ) 안에 있는 문장은 강조를 하겠다는 뜻이다. 영상에서는 일단 해당 단어를 빼고 white-t-shirt, short를 급하게 넣는데 임시로 넣은거라 안 따라해도 된다. (블로그나 유튜브를 공개처리하려면 꼭 옷을 입히자!!!)
best quality, (photorealistic:1.4), perfect female figure, full body,
(RAW photo, best quality), (realistic, photo-realistic:1.3), masterpiece, an extremely delicate and beautiful, extremely detailed, finely detail, 8k, huge filesize, ultra-detailed, highres, soft light, beautiful detailed girl, detailed fingers, extremely detailed eyes and face, beautiful detailed nose, beautiful detailed eyes, long eyelashes, light on face, looking at viewer, cute, young, realistic face, realistic body, beautiful detailed thigh, (ulzzang-6500-v1.1:0.8),
1girl, travel attendant, white t-shirt, shorts
이제 옷을 입은 여자가 생성된다.

그리고 이제 인종을 한국인으로 한정하기 위해 로라는 koreanDollLikeness를 사용한다. 여기서 로라라는 것은 위에서 얘기한 체크포인트를 보조, 보강한다는 개념으로 이해하면 쉬울것이다.
좀더 자세한 것은 여기 참조
Civitai에서 검색해서 해당 로라가 있는걸 확인했다면 스테빌리티 매트릭스에서 koreanDollLikeness로 검색해서 다운받는다.

다운 받은 로라를 툴에서 클릭하면 프롬프트에 자동으로 추가되는걸 볼수 있다.
best quality, (photorealistic:1.4), perfect female figure, full body,
(RAW photo, best quality), (realistic, photo-realistic:1.3), masterpiece, an extremely delicate and beautiful, extremely detailed, finely detail, 8k, huge filesize, ultra-detailed, highres, soft light, beautiful detailed girl, detailed fingers, extremely detailed eyes and face, beautiful detailed nose, beautiful detailed eyes, long eyelashes, light on face, looking at viewer, cute, young, realistic face, realistic body, beautiful detailed thigh, (ulzzang-6500-v1.1:0.8), <lora:koreanDollLikeness:1>
1girl, travel attendant, white t-shirt, shorts

로라의 가중치는 0.8로 한다. 그리고 가로:세로 비율을 2:3 정도로 길게 잡아주고 생성한다. (width 512, height 768)

아직은 한국인 승무원 같이 느껴지지는 않는다. 이 상태에서 부정 프롬프트를 입력해준다.
부정프롬프트
paintings, sketches, (worst quality:2), (low quality:2), (normal quality:2), lowres, ((monochrome)), ((grayscale)), skin spots, acnes, skin blemishes, age spot, glans, extra fingers, fewer fingers, ((watermark:2)), (white letters:1), (multi nipples), bad anatomy, bad hands, text, error, missing fingers, missing arms, missing legs, extra digit, fewer digits, cropped, worst quality, jpeg artifacts, signature, watermark, username, bad feet, {Multiple people}, blurry, poorly drawn hands, poorly drawn face, mutation, deformed, extra limbs, extra arms, extra legs, malformed limbs, fused fingers, too many fingers, long neck, cross-eyed, mutated hands, polar lowres, bad body, bad proportions, gross proportions, wrong feet bottom render, abdominal stretch, briefs, knickers, kecks, thong, {{fused fingers}}, {{bad body}},
bad-picture-chill-75v, ng_deepnegative_v1_75t, EasyNegative, bad proportion body to legs, wrong toes, extra toes, missing toes, weird toes, 2 body, 2 pussy, 2 upper, 2 lower, 2 head, 3 hand, 3 feet, extra long leg, super long leg, mirrored image, mirrored noise, (bad_prompt_version2:0.8), aged up, old,
부정프롬프트를 입력하고 생성하니 한국인스러운 이미지가 생성되는걸 알수 있다.

여기서 대한항공 승무원 복장으로 입혀줘야 하는데
긍정프롬프트에 푸른 블라우스, 미니 스커트를 입력해준다. 거기다가 정확하게 항공기 승무원이라고 단어도 수정한다.
best quality, (photorealistic:1.4), perfect female figure, full body,
(RAW photo, best quality), (realistic, photo-realistic:1.3), masterpiece, an extremely delicate and beautiful, extremely detailed, finely detail, 8k, huge filesize, ultra-detailed, highres, soft light, beautiful detailed girl, detailed fingers, extremely detailed eyes and face, beautiful detailed nose, beautiful detailed eyes, long eyelashes, light on face, looking at viewer, cute, young, realistic face, realistic body, beautiful detailed thigh, (ulzzang-6500-v1.1:0.8), <lora:koreanDollLikeness:0.8>,
1girl, flight attendant, blue blouse, white knee-length skirt
여기까지 작업을 했으면 인물묘사에 해당하는 붉은색 부분을 제외한 프롬프트를 베이스 프롬프트로 세팅해서 저장한다.
저장법은 영상을 참조한다.

이제 모든 프롬프트를 지우고 오른쪽의 저장한 베이스 프롬프트를 로드하면 보이지는 않지만 기본으로 해당 프롬프트가 적용된 상태가 된다.

그래서 이 상태에서 인물묘사에 해당하는 부분만 입력하면 그대로 똑같이 사용할수가 있다.

그런데 이 상태로 관리하면 실사이미지 base 안에 긍정프롬프트와 부정프롬프트가 한세트로 다니게 되는데 부정프롬프트를 분리해서 따로 저장하게 되면 다른 스타일과 조합해서 사용할수가 있어 편리한점이 있다.

이렇게 스타일을 세팅하면 긍정 / 부정 프롬프트 스타일별로 분리해서 UI에서 표시하면 좋은 그 방법은 다음과 같다.
스테빌리티매트리스 설치 폴더에서 Data > Packages > Stable Diffusion WebUI > style.csv 파일을 찾는다.

이 파일을 열어보면
A열은 제목, B열은 긍정프롬프트, C열은 부정프롬프트가 저장되어 있다. 여기서 적당한 구분자와 순서를 맞춰주면 스테이블 디퓨젼에서 그대로 보여진다.

이제 실사이미지 base와 실사이미지 base_negative를 등록하고 사용하자.
이 상태로 승무원 복장을 위해 로라 파일을 찾아보자.
Stewardess Uniform Lora로 찾아보면 쉽게 찾을수 있다. 다운받고 적용해보자. 과정은 생략한다.
로라 파일 디테일 패널에 보면 Trigger Words라는게 있다. 이걸 입력해야 제대로 적용되는듯 하다.
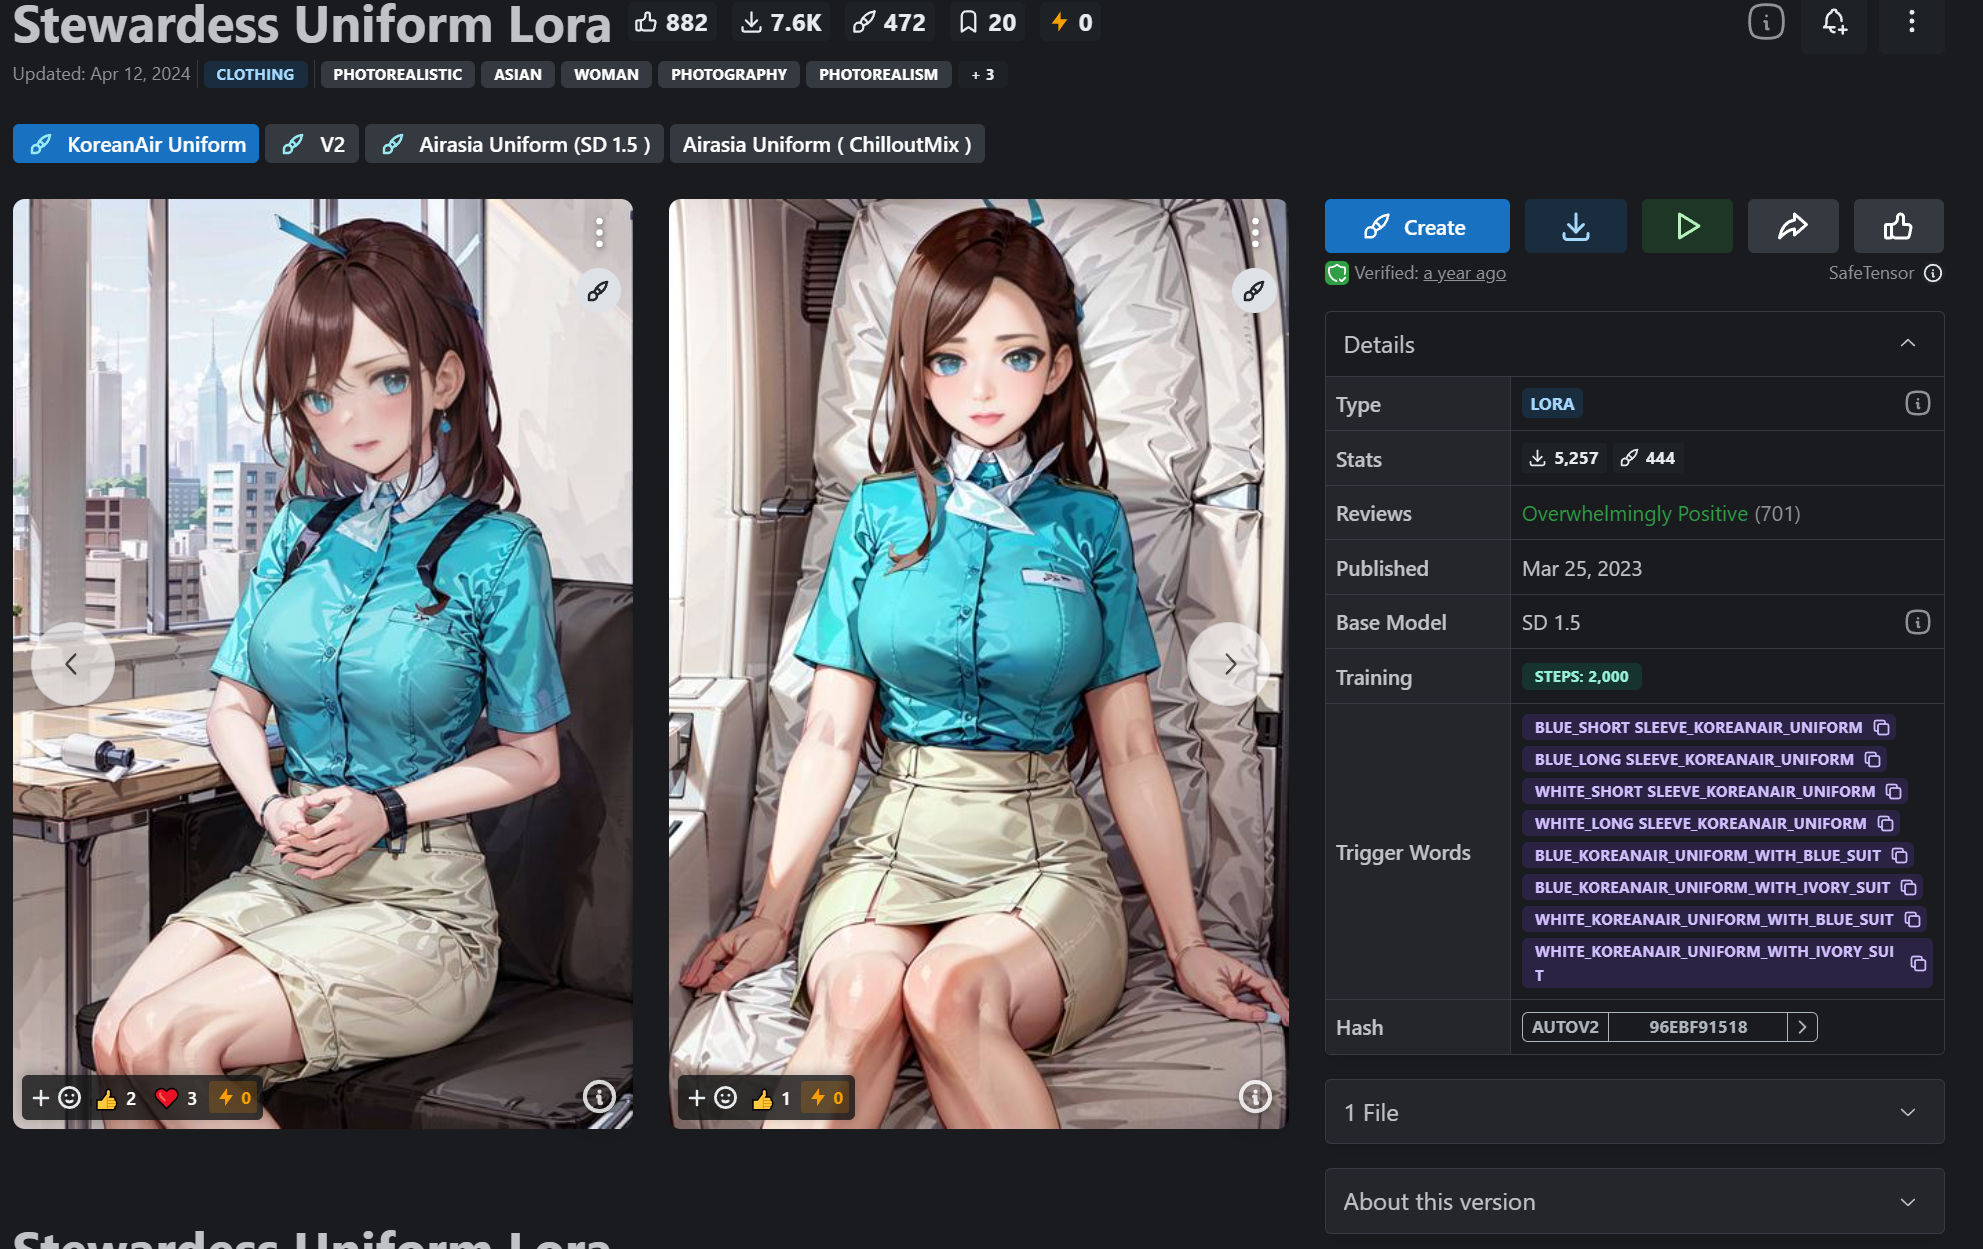
트리거 워드를 프롬프트에 입력한다.
1girl, flight attendant, blue_short sleeve_koreanair_uniform, <lora:KoreanAir Uniform:1>
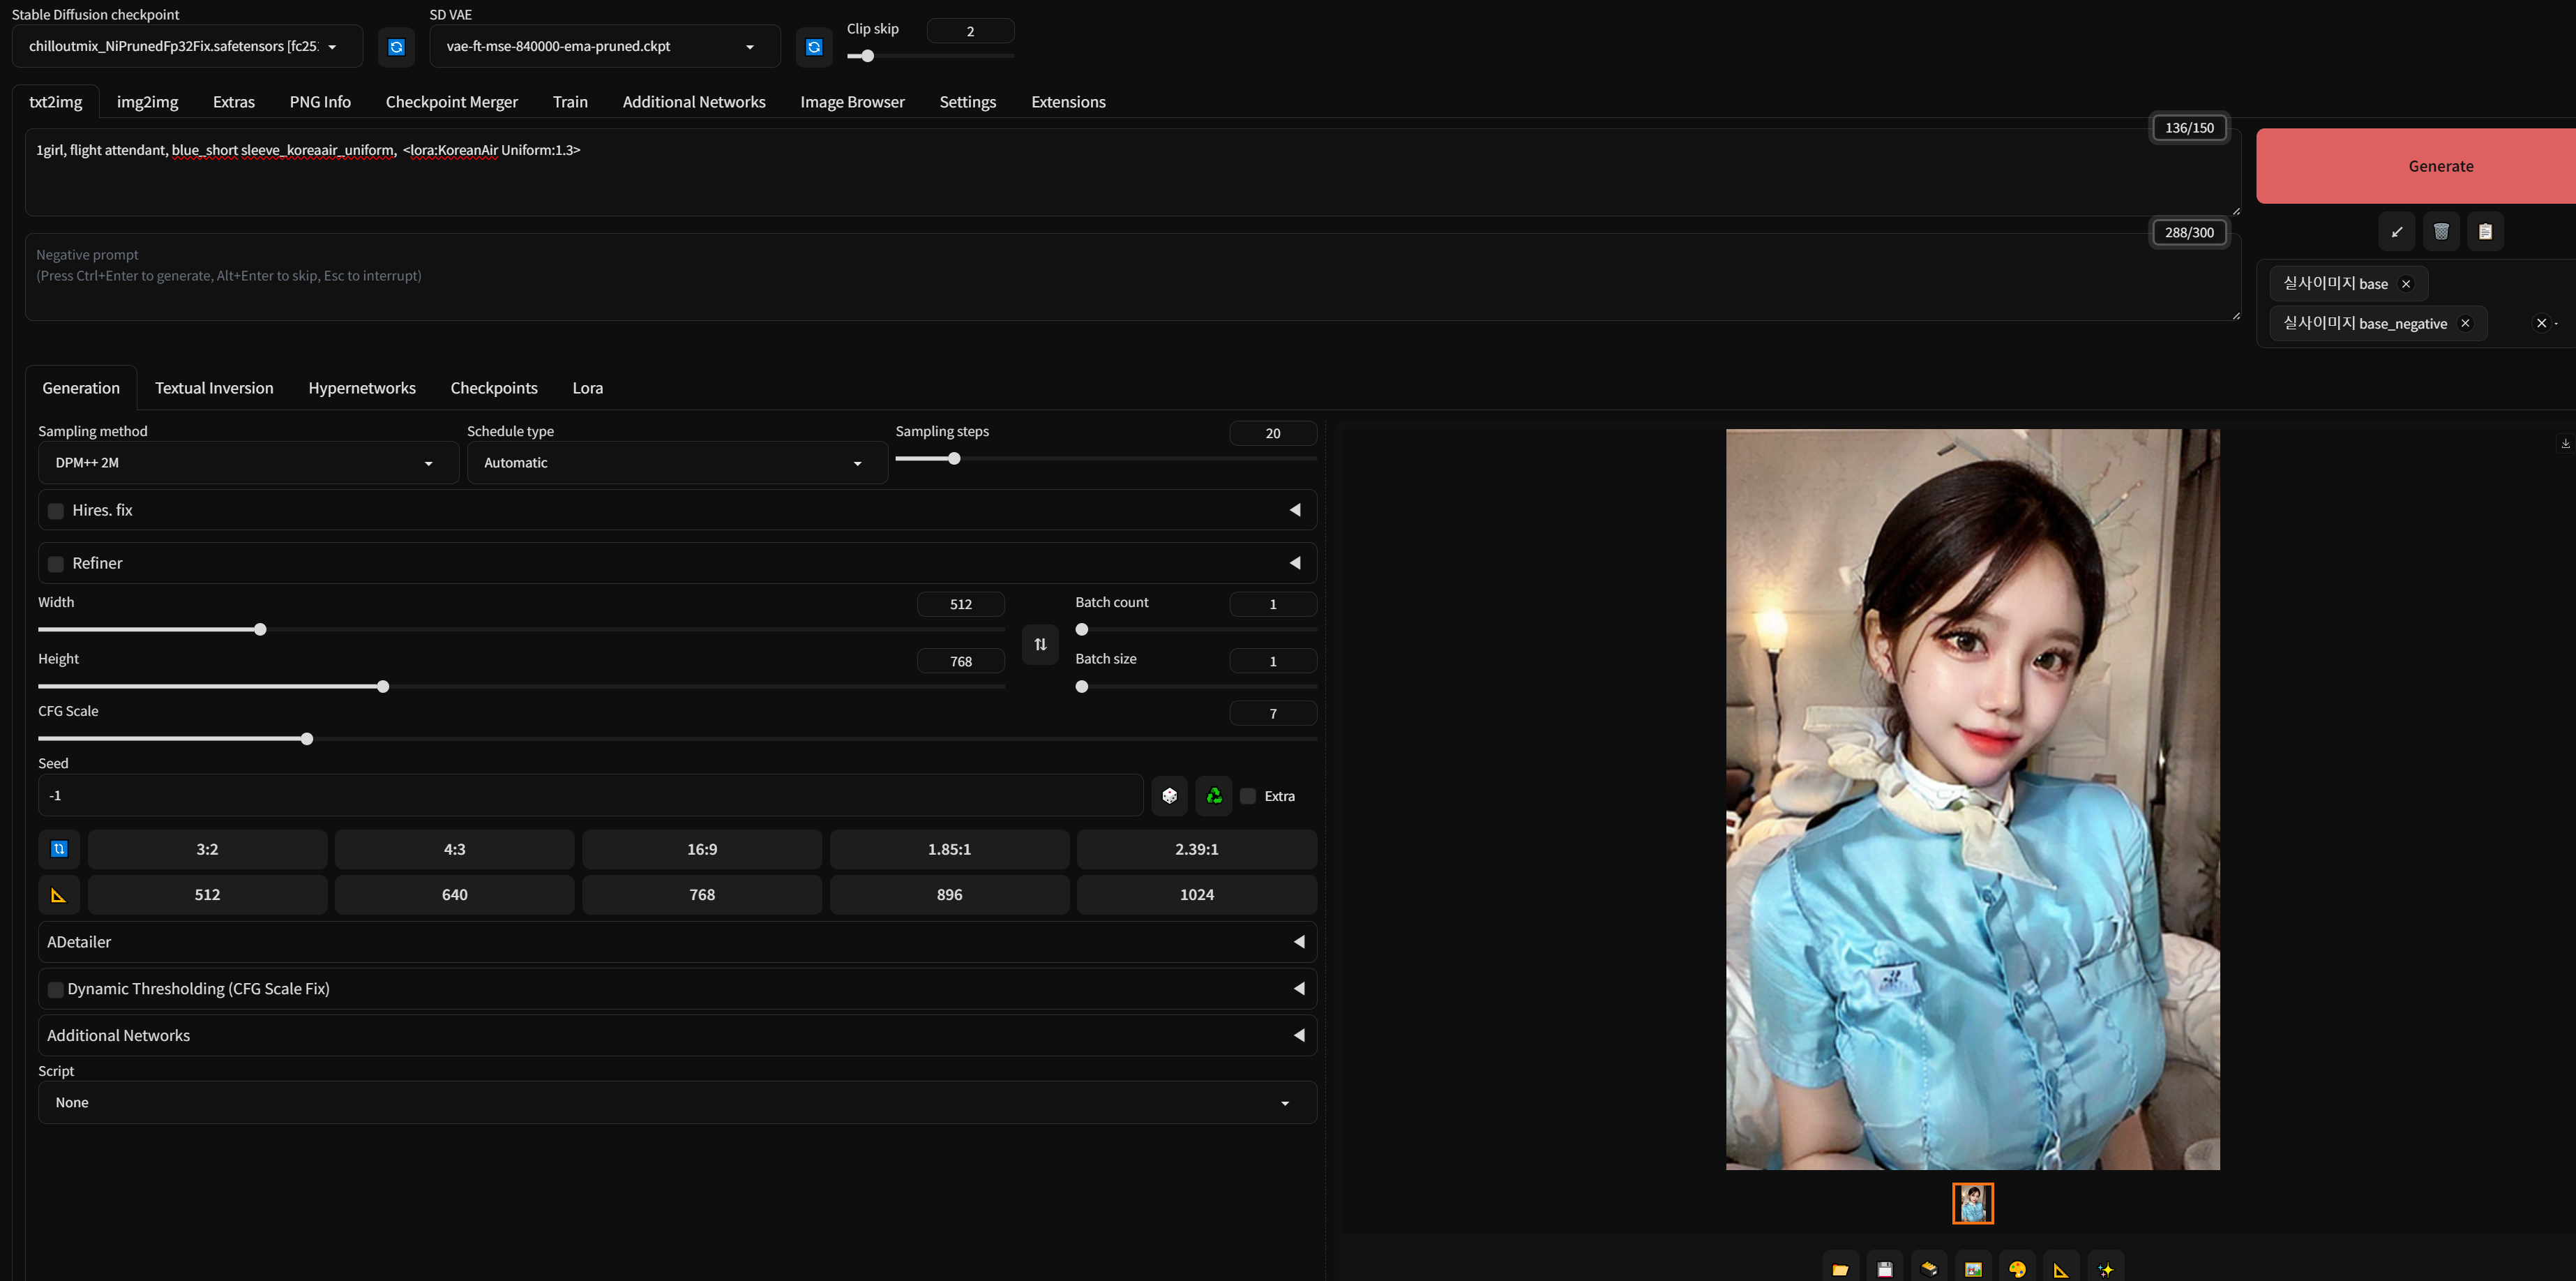
배경을 비행기안으로 지정하자.
1girl, flight attendant, blue_short sleeve_koreanair_uniform, <lora:KoreanAir Uniform:1>, in airplane

하지만 이미지가 좀 이상해 보인다.
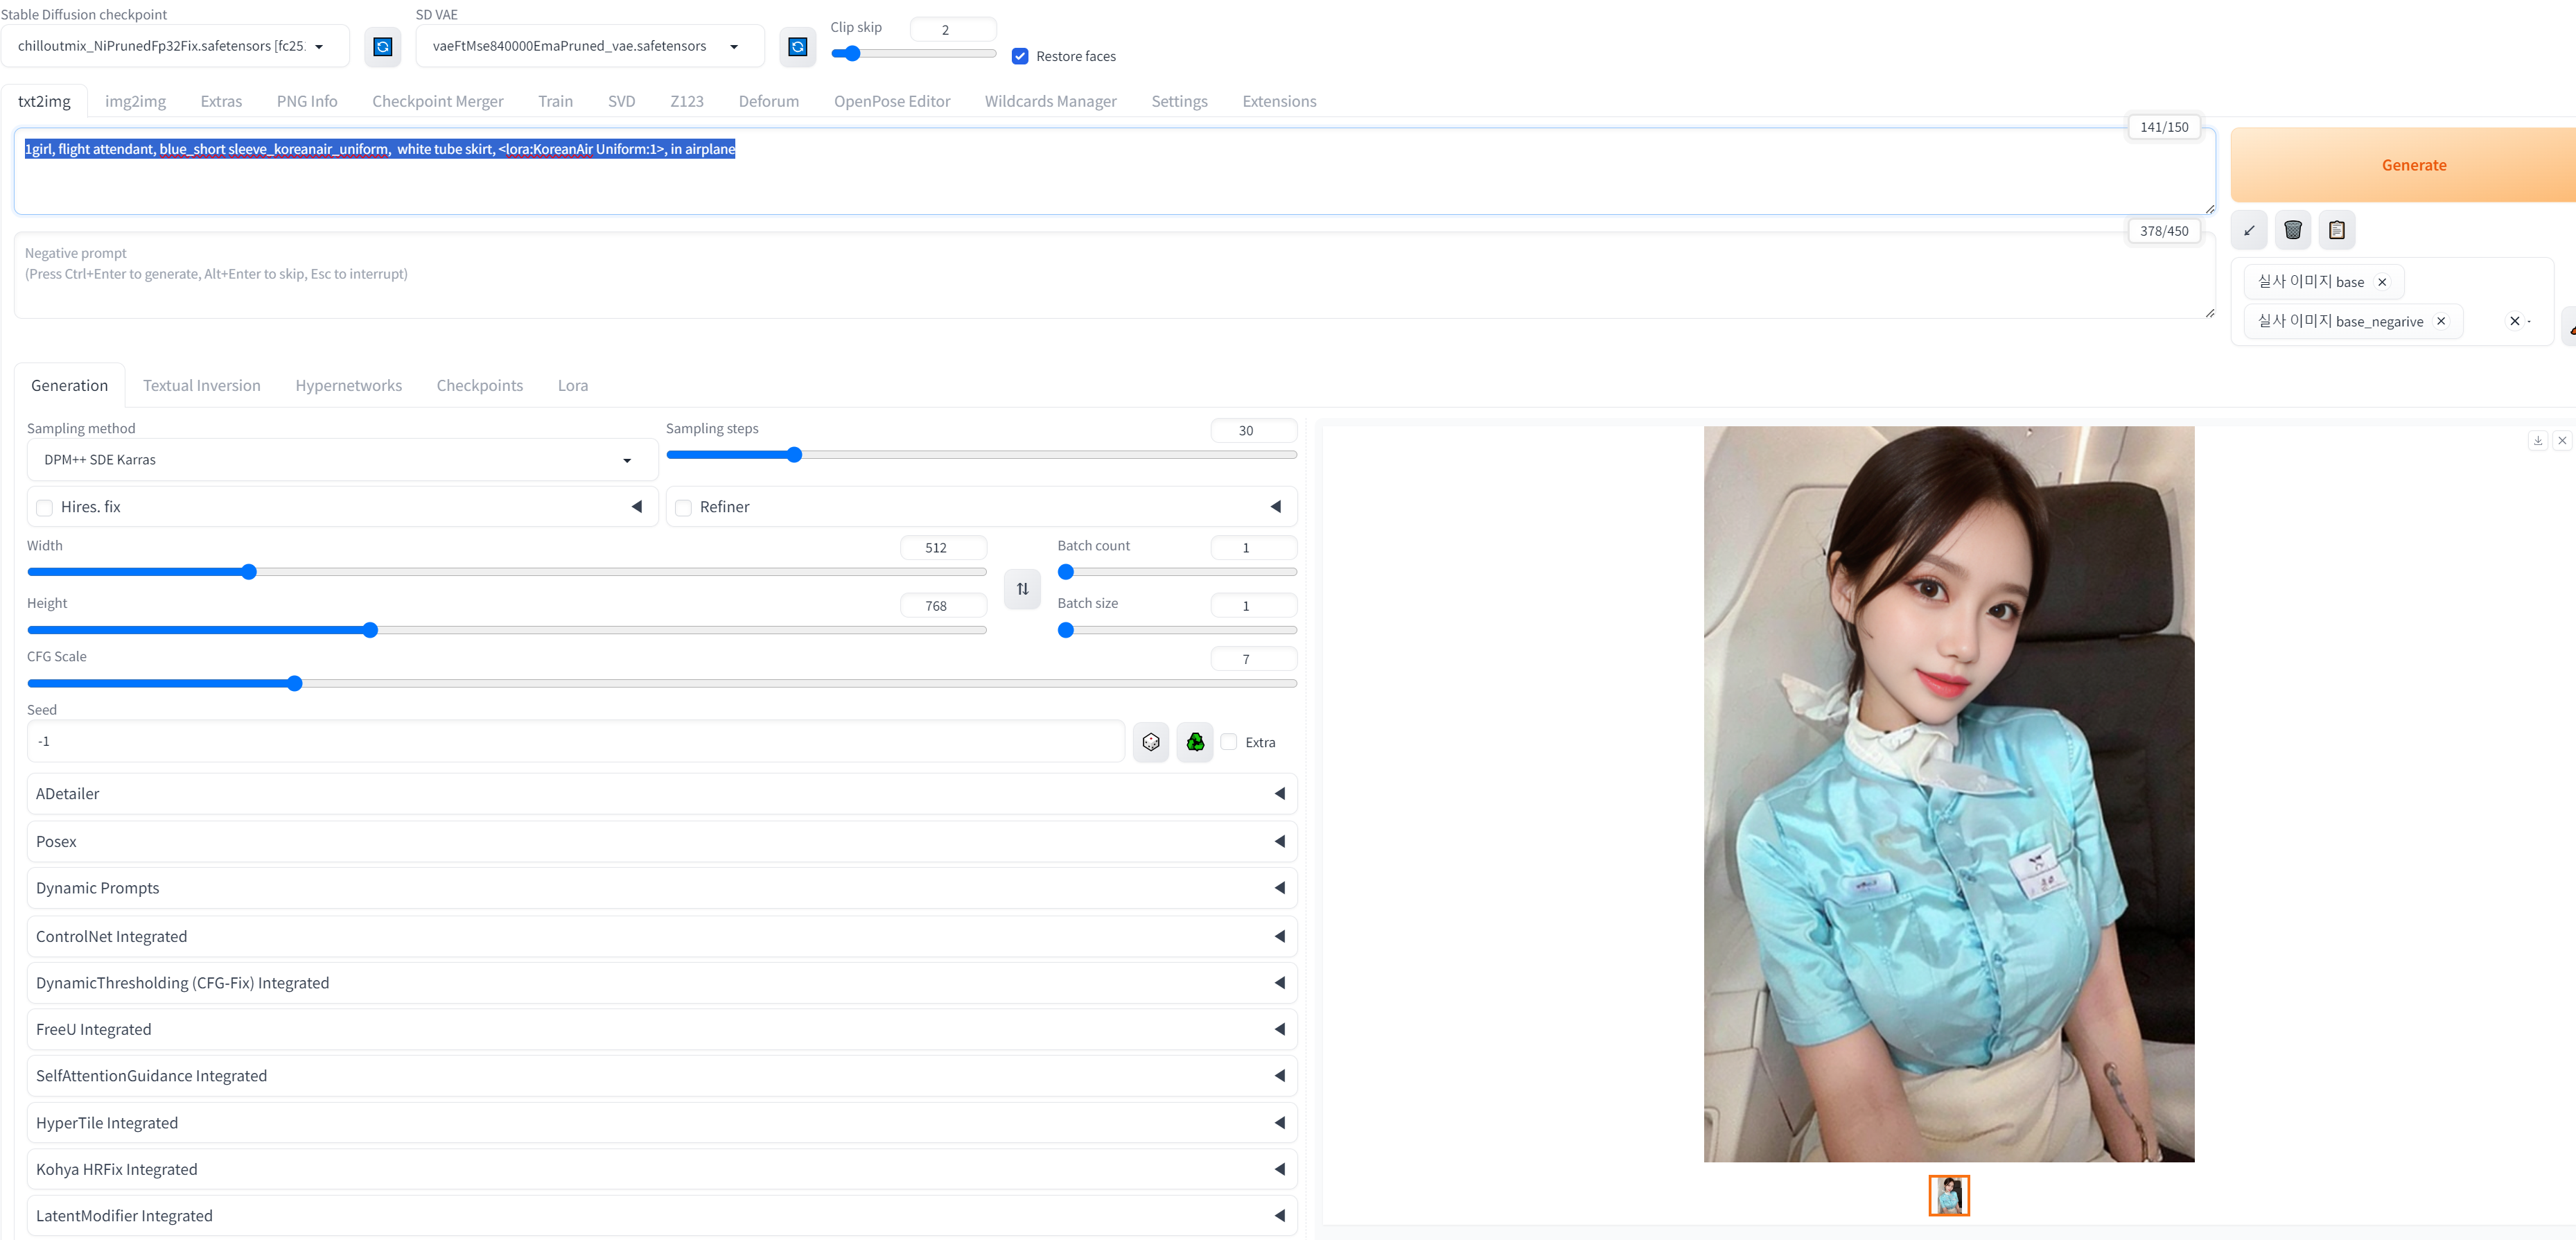
샘플링 단계를 높여보고 샘플링 방식도 변경해본다. 근데 하다보면 원하는 복장이 계속 안나올때가 있는데 Lora의 처리 방식의 영역이므로 가중치를 좀 줄여본다든지, 오타가 있는지등을 체크해보자.
샘플링은 DPM++ SDE Karras, 샘플링 스텝은 30으로 한 생성물이다. 샘플러와 스텝수를 변경하니 많이 좋아졌다.

치마를 하얀색 튜브 스타일로 바꿔보자.
1girl, flight attendant, blue_short sleeve_koreanair_uniform, white tube skirt, <lora:KoreanAir Uniform:1>, in airplane
이제 어느정도 마무리 되었다. 스카프도 제대로 추가해보자.
1girl, flight attendant, blue_short sleeve_koreanair_uniform, white tube skirt, flight attendant scarf, <lora:KoreanAir Uniform:1>, in airplane 그리고 로라의 가중치도 살짝 낮춰보자.

파란 블라우스가 갑자기 하얀색으로 바뀌게 되었다. 이런 경우에는 blue_short sleeve_koreanair_uniform 다음에 나오는 white tube skirt 라는 문구에서 white라는 단어에 영향을 받아 그런게 된 경우라고 한다. 이럴땐 서로 다른 구문 사이에 BREAK를 넣어서 서로 다른 프롬프트로 인식하게 된다.
1girl, flight attendant, blue_short sleeve_koreanair_uniform BREAK white tube skirt, flight attendant scarf, <lora:KoreanAir Uniform:0.4> in airplane

이제 복장은 어느정도 세팅이 된거 같고 머리를 승무원 스타일로 바꿔보자.
1girl, flight attendant, blue_short sleeve_koreanair_uniform BREAK white tube skirt, flight attendant scarf, <lora:KoreanAir Uniform:0.6> in airplane, crew head
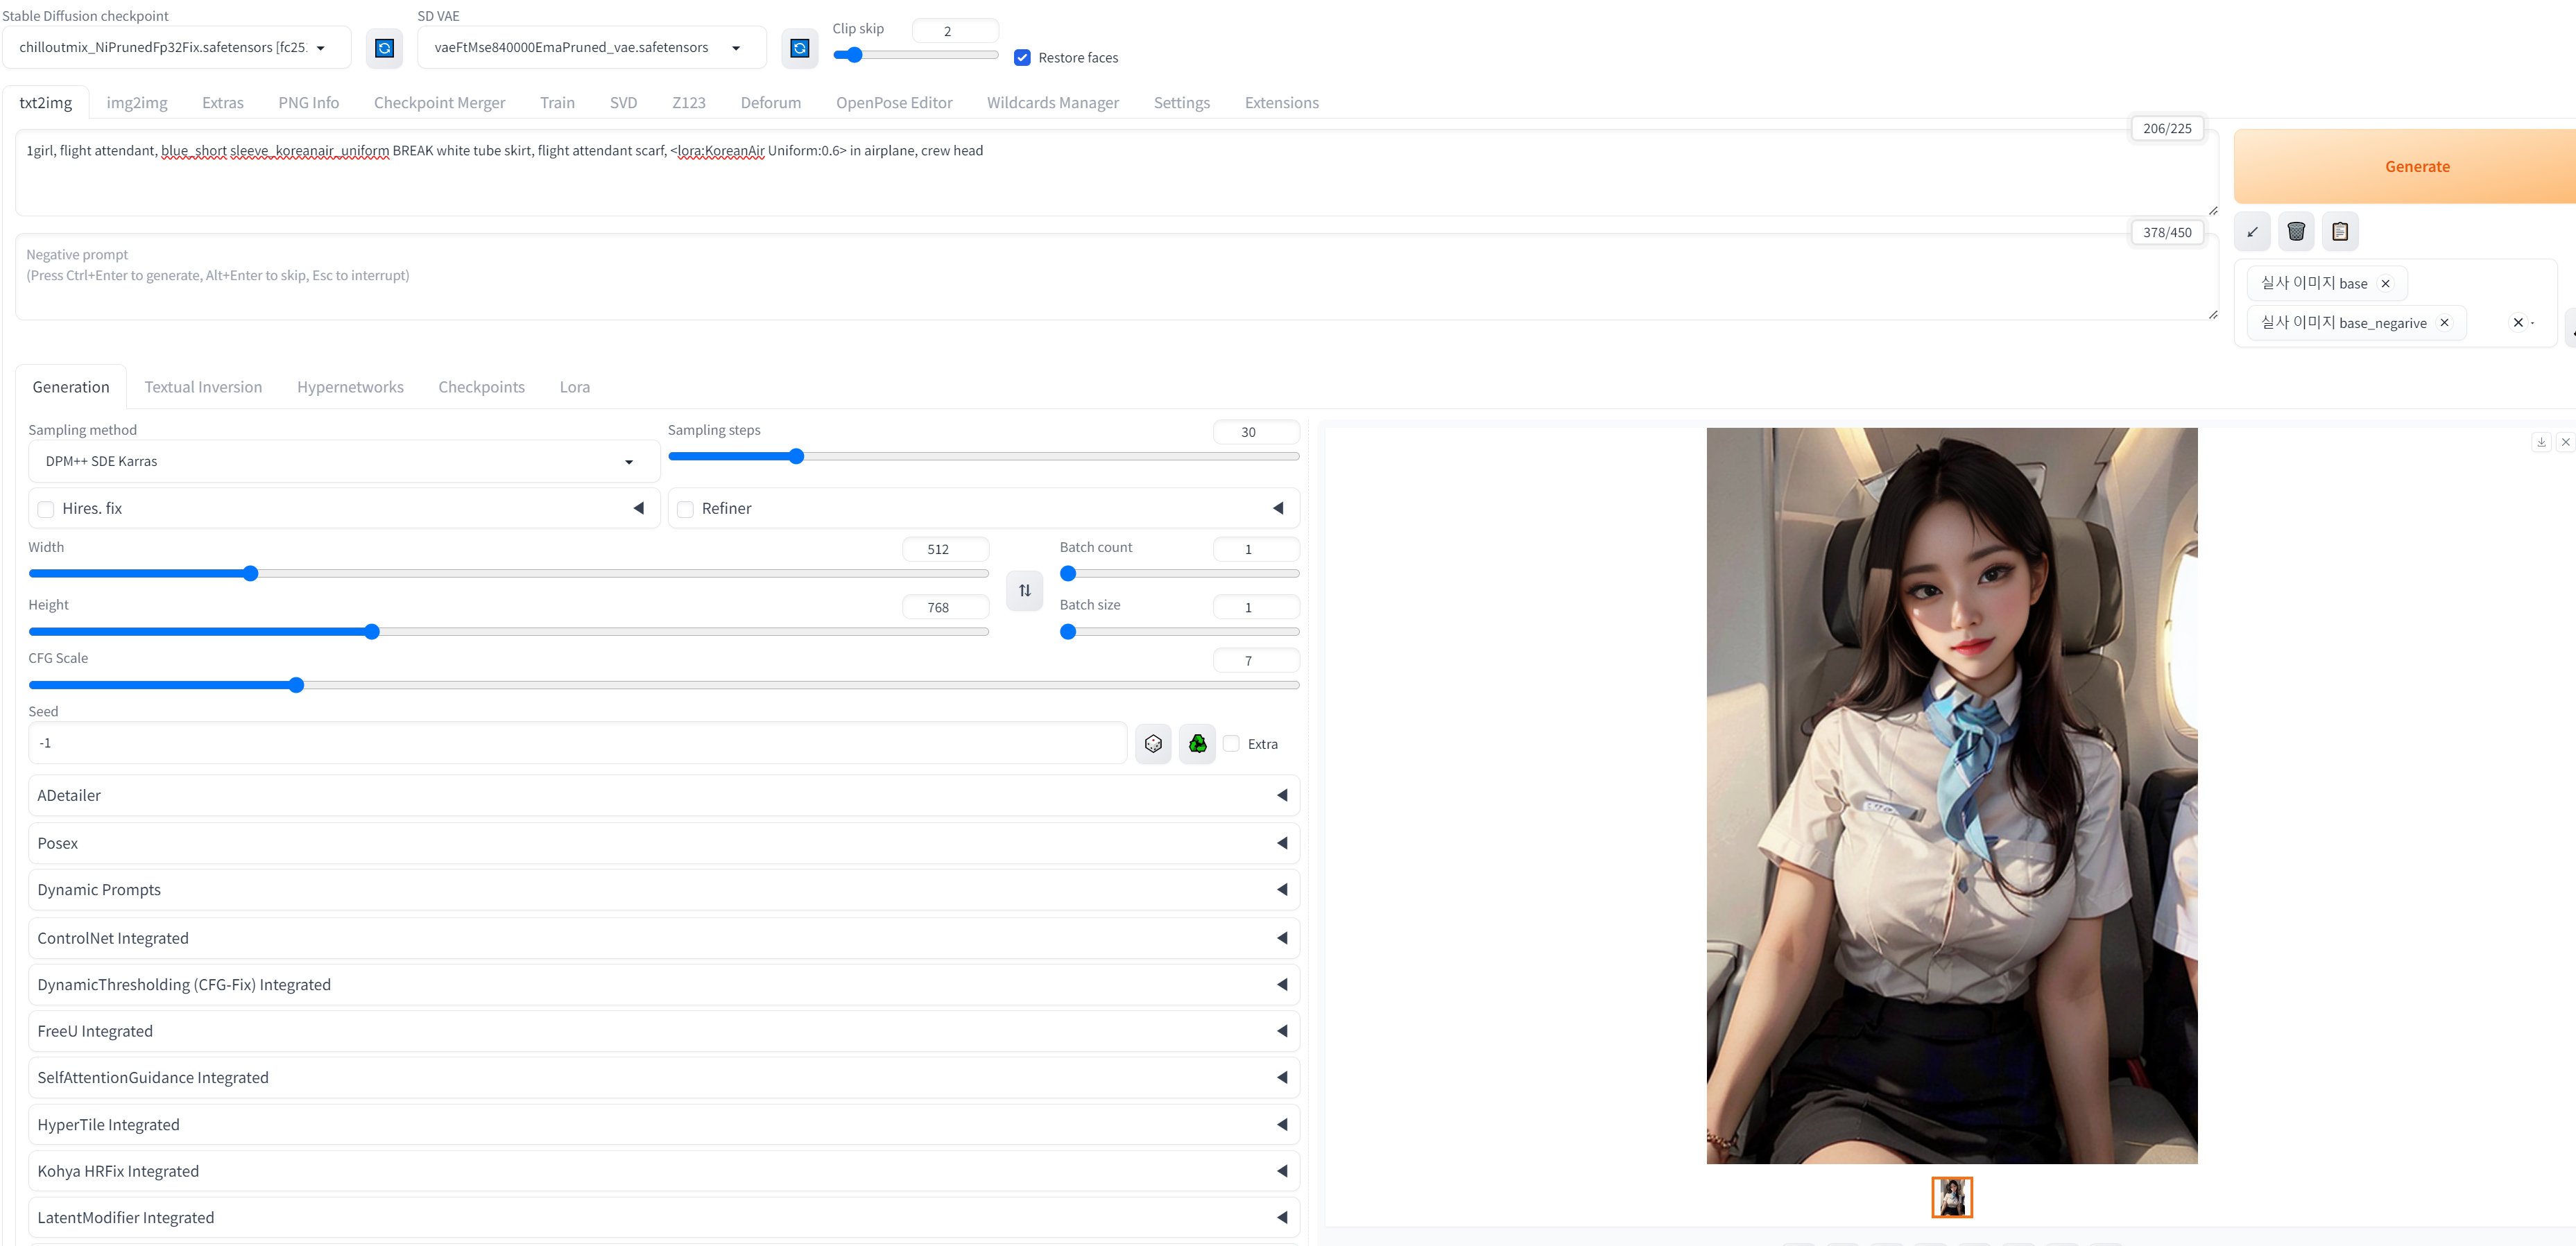
근데 또 복장이 바뀌고 머리스타일도 승무원 스타일이 안나온다. 이럴때 각 문장에서 강조하고 싶은 부분을 괄호로 처리한다.
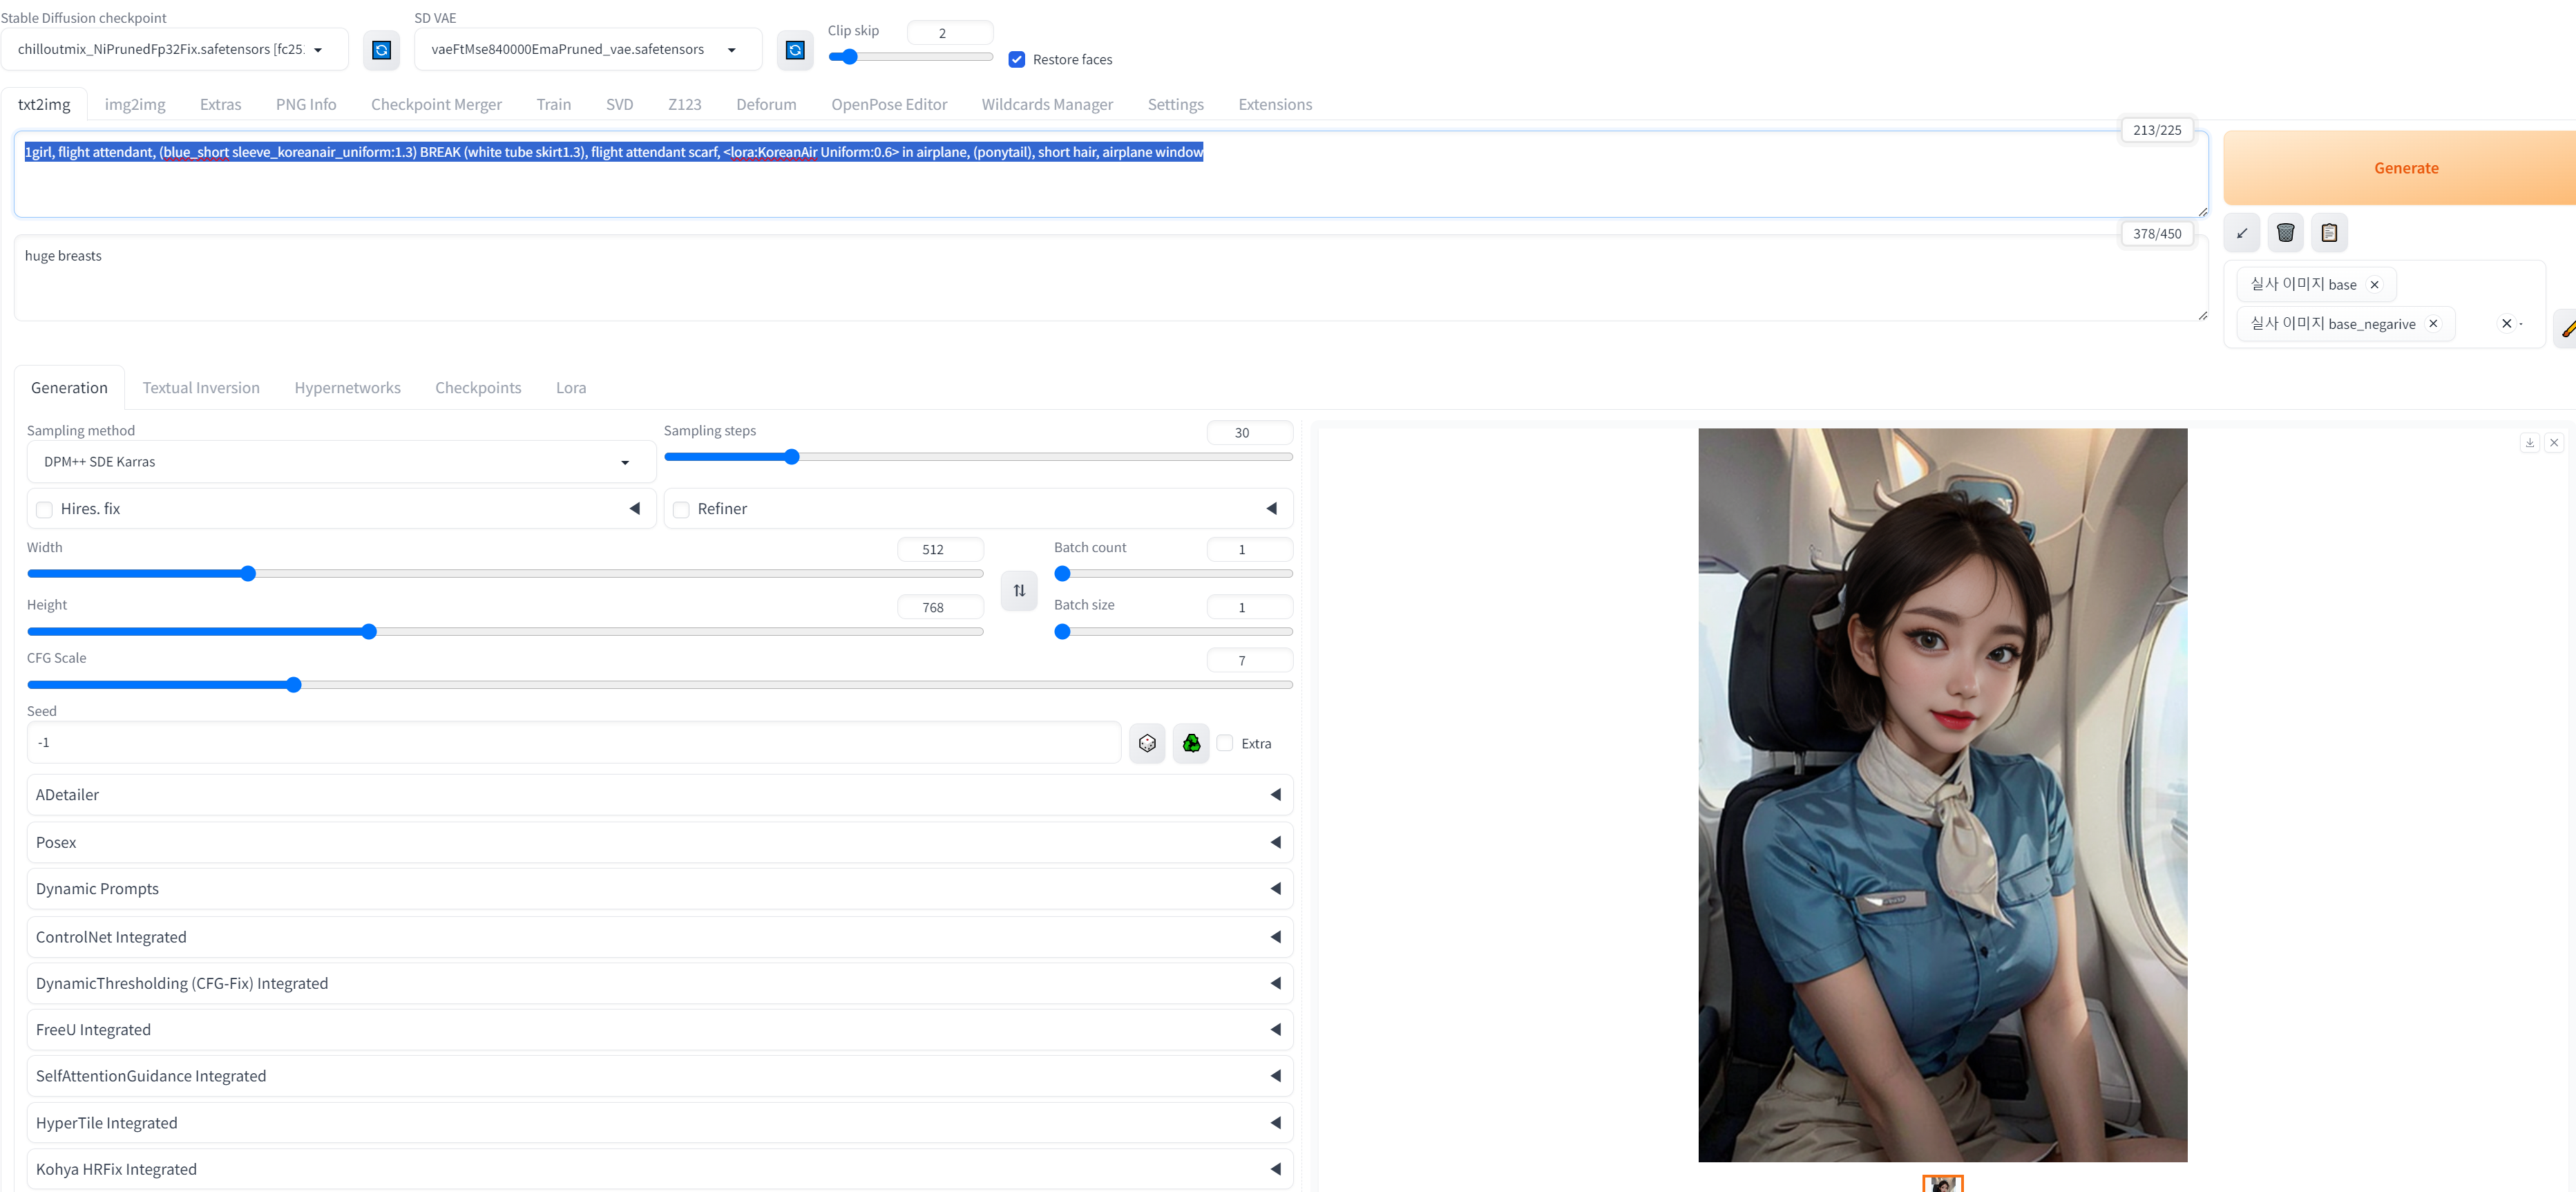
1girl, flight attendant, (blue_short sleeve_koreanair_uniform:1.3) BREAK white tube skirt, flight attendant scarf, <lora:KoreanAir Uniform:0.6> in airplane, (ponytail), short hair

이제야 원하던 이미지가 출력된다. 몇번 반복을 해도 스타일이 유지되는걸 알수 있다.


체크포인트 모델이 가슴이 큰 걸 강조하기 때문에 조금 작은 가슴으로 바꿔보는데 이번엔 네거티브로 huge breasts, 라고 입력해보자.

화이트 스커트도 자주 색이 바뀌기 때문에 더 강조하자.
프롬프트
1girl, flight attendant, (blue_short sleeve_koreanair_uniform:1.3) BREAK (white tube skirt1.3), flight attendant scarf, <lora:KoreanAir Uniform:0.6> in airplane, (ponytail), short hair
네거티브 프롬프트
huge breasts

비행기 창문도 고정으로 계속 나왔으면 하면
1girl, flight attendant, (blue_short sleeve_koreanair_uniform:1.3) BREAK (white tube skirt1.3), flight attendant scarf, <lora:KoreanAir Uniform:0.6> in airplane, (ponytail), short hair, airplane window
영상에서는 조금 더 디테일을 살리기 위해 add_detail 로라를 추가하고 0.5정도의 가중치를 주는데 내 경우에는 너무 과하게 눈과 입이 커져서 오히려 이상해보여서 일단 뺐다.

일단 일관성 있게 결과물이 나오는걸 확인했으면 출력갯수를 늘려서 더 확인해보자.

배치 카운트를 늘려서 출력해보아도 원하는 컨셉의 이미지가 나오는걸 확인할수 있다.
여기서 해상도를 늘리는 작업을 진행해보자.
출력 결과물 밑에 있는 아이콘들 중에 삼각자 모양의 아이콘을 클릭하게 되면 출력물을 Extras 탭으로 보내게 되는데

여기서 하단에 있는 Scale By의 값을 2로 하게 되면 2배의 해상도로 바뀐다는 의미이다.
업스케일러는 R-ESRGAN 4x+를 사용 왼쪽이 업스케일 전, 오른쪽이 업스케일후이다. 확실히 선명도등이 올라간걸 알수있다.


요약
프롬프트 정리를 잘해두자. ㅎ
'기타 > AI 활용하기 - 스테이블디퓨전' 카테고리의 다른 글
| 스테이블 디퓨전을 활용하기 위한 세팅 7 (Comfy UI 세팅하기) (2) | 2024.06.21 |
|---|---|
| 스테이블 디퓨전을 활용하기 위한 세팅 5 (멀티 ControlNet) (4) | 2024.06.02 |
| 스테이블 디퓨전을 활용하기 위한 세팅 4 (Forge 에 ControlNet 모델 설치) (3) | 2024.05.25 |
| 스테이블 디퓨전을 활용하기 위한 세팅 3 (Stable diffusion Forge) (3) | 2024.05.23 |
| 스테이블 디퓨전을 활용하기 위한 세팅 1 (6) | 2024.05.15 |